








WooCommerce
Ratepay for WooCommerce — pay by invoice and SEPA direct debit on the Ratepay page
Free + Pro
1 490 UAH/year≈ €30
v1.0.0
 Website auditA PDF report by email in 3 minutesCheck a website
Everyday tasks
Image compressorSize, quality and WebP in bulkQR generatorLink, Wi-Fi, payment to IBANVAT calculator20, 14, 7% and amount in wordsTransliterationOfficial Ukrainian standardWebsite checks
PHP and pluginsPHP version, WordPress, pluginsGoogle Merchant feedFields, prices, GTIN, imagesDomain emailSPF, DKIM, DMARC, blacklistsAI search readinessllms.txt, bots, markupAll 9 toolsEnter at least 2 characters
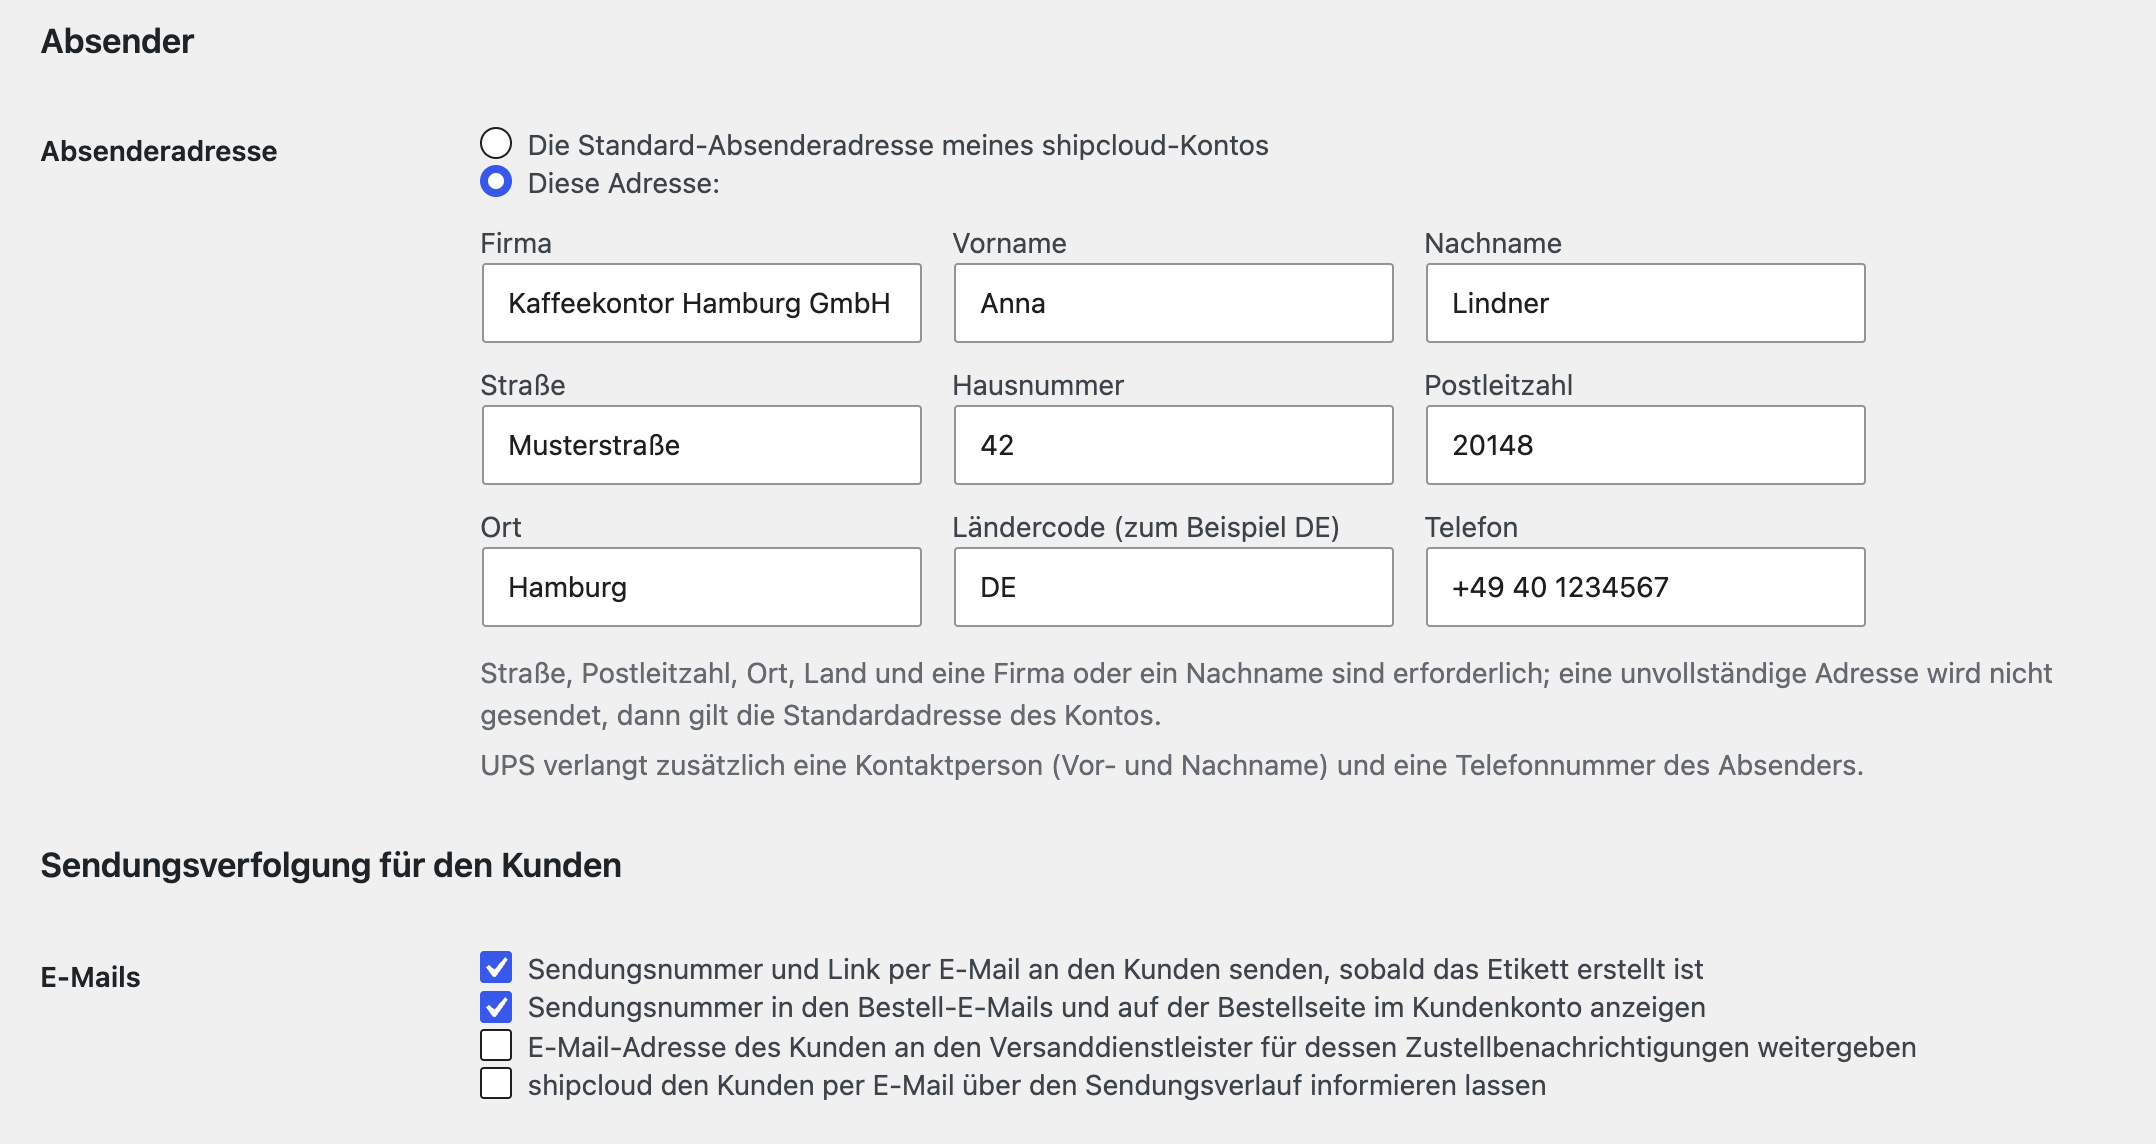
DHL, DPD, GLS, Hermes and UPS labels straight from the WooCommerce order through your shipcloud account.
The free version works with no time limit. Pro adds the rest of the features in the table.


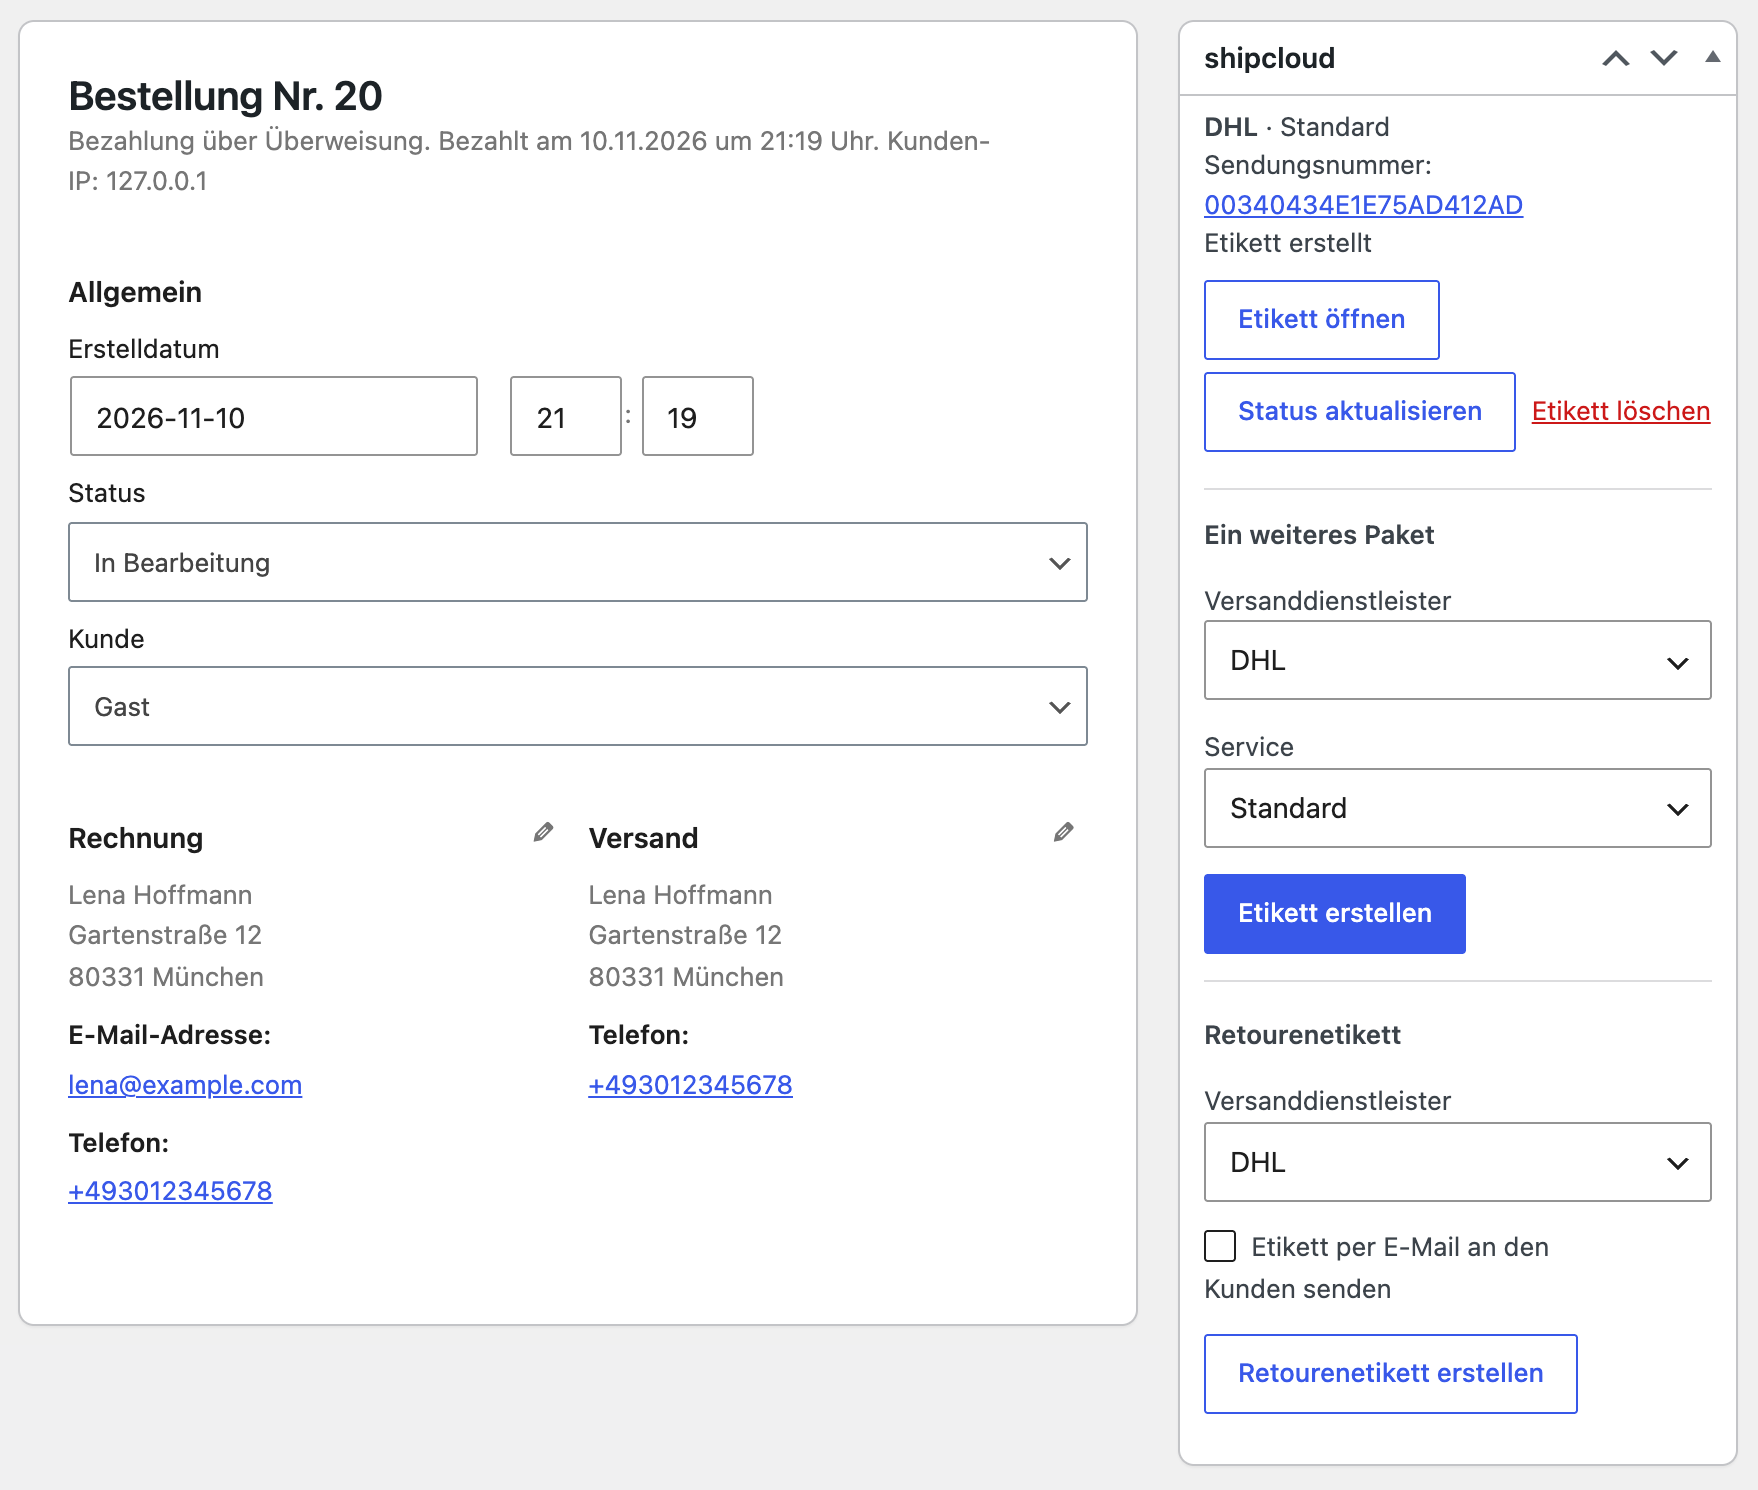
A shipcloud box appears on the order screen: choose the carrier, the service and the package type, check weight and size, and press “Create label”.

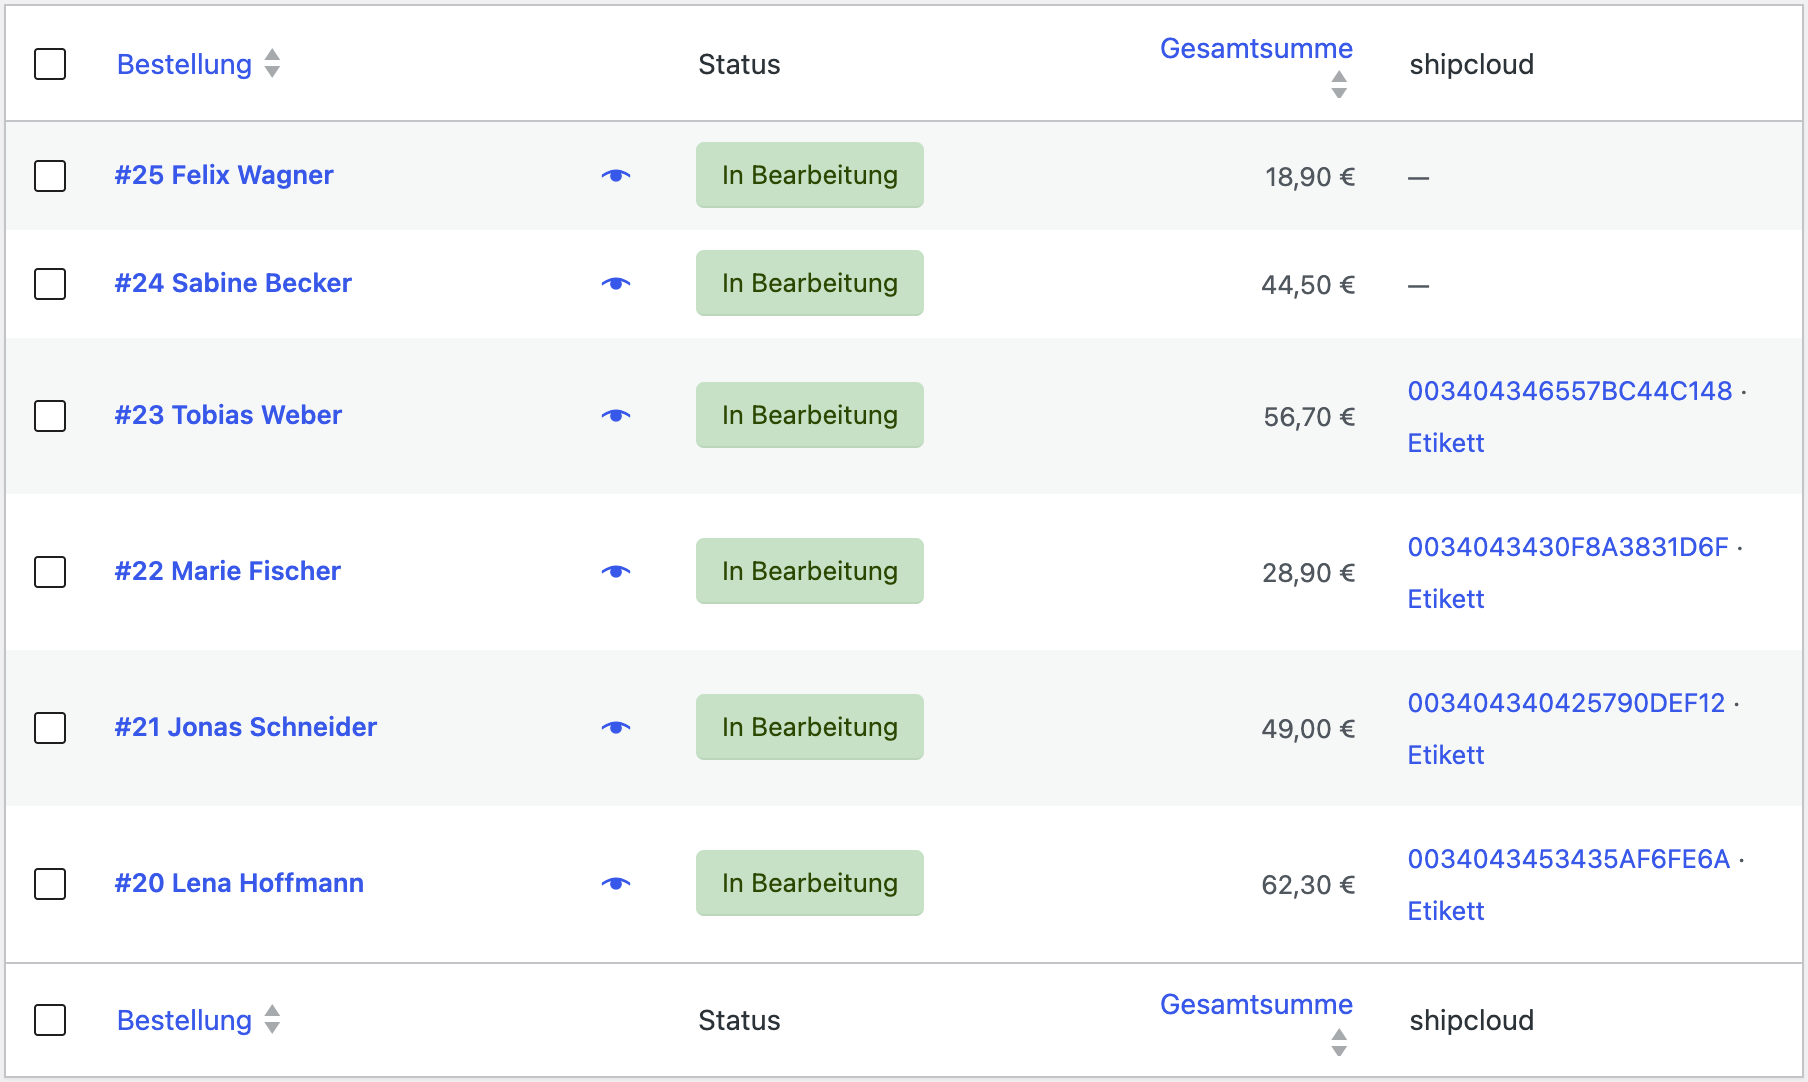
The bulk action “Create shipcloud labels” in the orders list: labels are created in the background, one order per task, and a column shows the tracking number and the label link.

The base version is free. Pro costs 990 UAH for a one-year licence. A year of updates, technical support and all Pro features.

A fresh install is the free version, nothing switches on by itself. The “Try Pro for 7 days” button → e-mail → the key right in the window and by e-mail.

Moving the site? Unlink the licence on the old domain and activate it on the new one yourself. A staging copy (staging., dev.) works with the same key and does not take a site slot. For studios — keys for 5 or 25 sites, or unlimited.
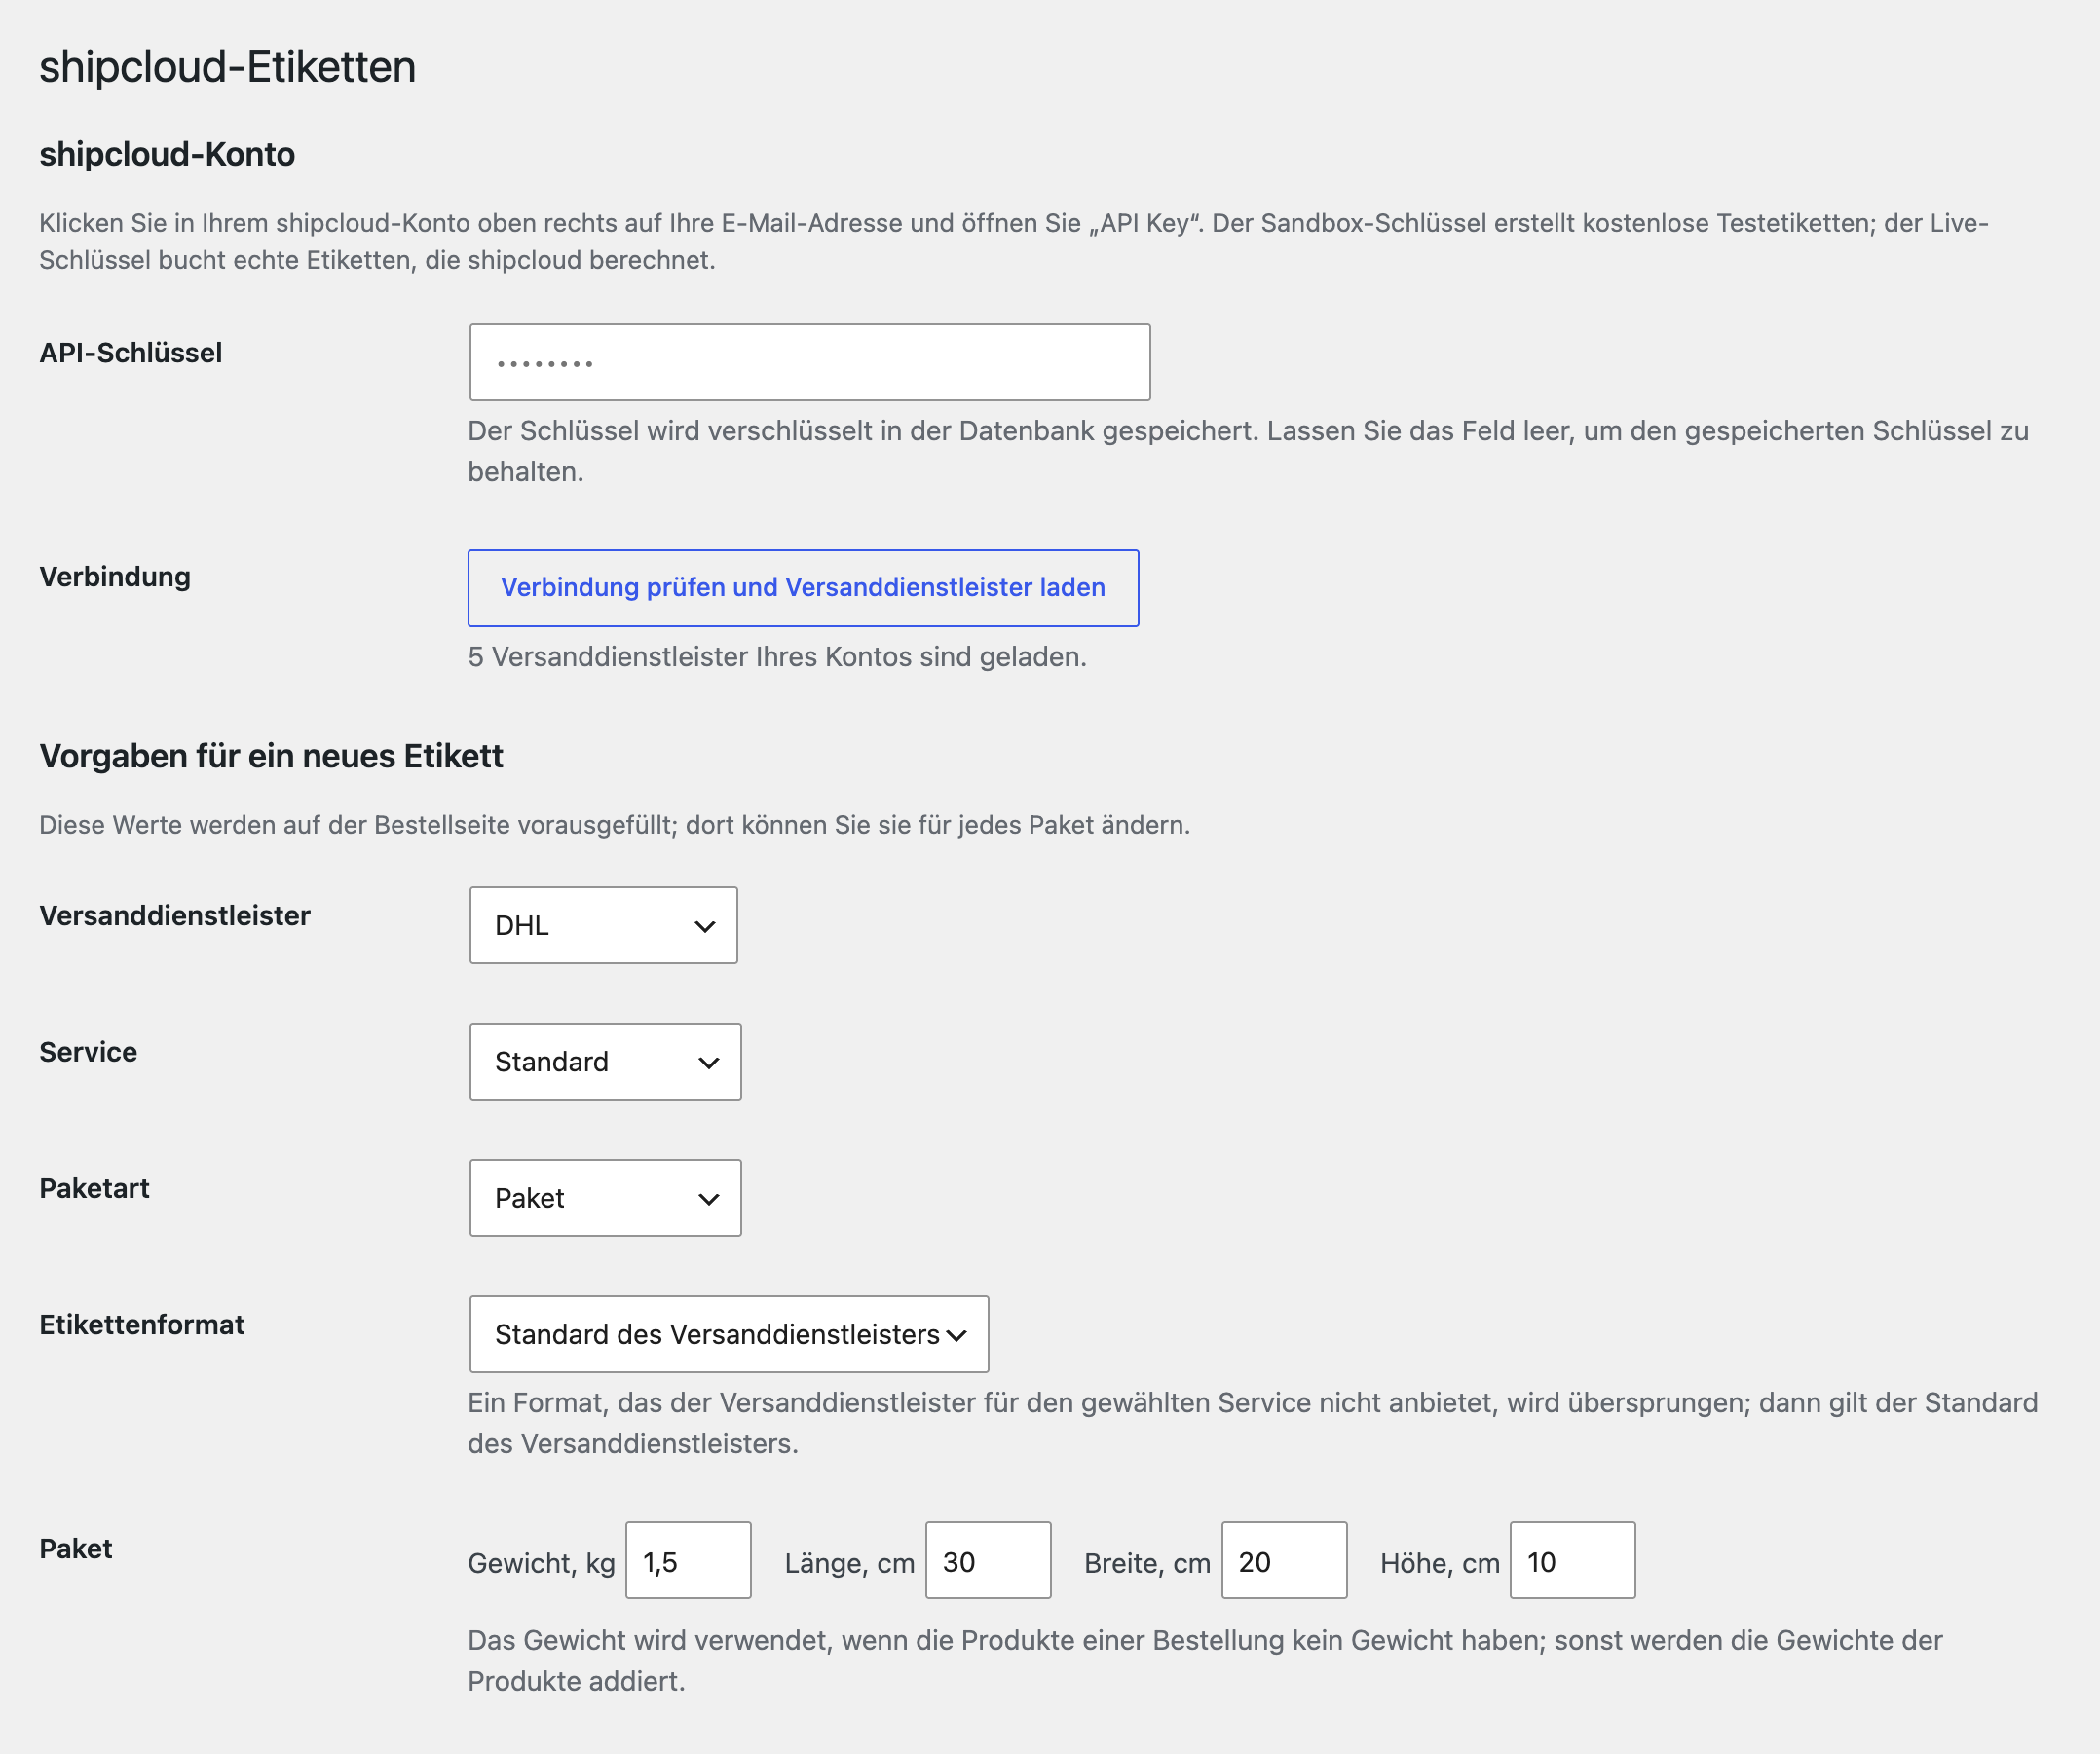
 WordPress 6.2+, WooCommerce 7.0+, PHP 7.4+.A shipcloud account with an API key and connected carriers.Sender and buyer addresses in Germany or in other countries your carriers serve.
Labels from the order, several parcels, delete, status, customs declaration, tracking in the order, e-mails and the account.
CatCode Labels with shipcloud for WooCommerce creates carrier labels from a WooCommerce order through your shipcloud account (shipcloud.com), a German service that brings DHL, DPD, GLS, Hermes, UPS and other carriers together in one API. The module takes the address and the weight from the order and puts the label and the tracking number back on it.
A shipcloud box appears on the order screen: choose the carrier, the service and the package type, check weight and size, and press “Create label”. The label PDF opens from the same box. The module reads the list of carriers and services from your shipcloud account, so you only see what you can book. The weight is added up from the products of the order and converted to kilograms; products without a weight use the default weight and size. The address is split into street and house number, as the carriers require. For parcels leaving the EU customs area a customs declaration with the items of the order is added. If an order ships in several boxes, create one more label for the same order. A label can be deleted from the box as long as the carrier allows it, and “Update status” reads the current tracking status of the parcel from shipcloud. The sender address is the default of your shipcloud account or one you enter in the settings. The tracking number and link go into the order notes, the “Processing” and “Completed” e-mails and the order page of the buyer account; optionally the buyer gets a separate e-mail the moment the label is created. If the carrier refuses, the reason in its own words is shown in the box and written to the order notes, and the button works again. A double click creates one label.
The bulk action “Create shipcloud labels” in the orders list: labels are created in the background, one order per task, and a column shows the tracking number and the label link. The shipping method “shipcloud live price” in the shipping zones: the price shipcloud quotes for the parcel of the cart for the carrier and service you choose, with your surcharge in percent or a fixed amount and a fallback price when shipcloud returns none. It works at the classic and the block checkout. A return label from the order screen (the buyer is the sender), with an optional e-mail to the buyer. Tracking updates: shipcloud tells the shop about every status change of a parcel; it goes into the order notes, is shown to the buyer and can set the order to a status you choose when the carrier has the parcel and when it is delivered. Pickup requests for DPD, GLS, Hermes and UPS in a time window you choose. Carrier rules by destination country and weight. Updates from catcode.com.ua.
The module is not on wordpress.org yet: the free version and Pro are one archive from this page. Without a key it works as the free version.
Didn't find the answer? Message us on Telegram and we'll reply within a business day.
 @catcode_support
Setup, compatibility, activation
No. It is an independent integration made by us; shipcloud is a trademark of its owner, and the module is not affiliated with shipcloud.
Yes. Labels are created and charged through your shipcloud account, under the contracts of shipcloud or your own.
The ones connected in your shipcloud account, for example DHL, DPD, GLS, Hermes and UPS. The module reads their list from the account.
In the order e-mails, on the order page of the account and, if you switch it on, in a separate e-mail the moment the label is created.
In the order box and in the order notes: the words of the carrier or shipcloud, unchanged.
No, the module does not offer them.
Pro switches off, the free part keeps working.
No reviews yet. Be the first.
No questions yet. Ask one — we answer within 24 hours.
We build custom modules for WordPress, WooCommerce, OpenCart and Shopify. Tell us about the task and we'll prepare an estimate.
Order a custom module
—
Charged in UAH; your bank converts it to your currency. EUR price is approximate.

CatCode assistant
Just now


CatCode assistant
Online

I’ll help with your website task
Describe your website task — I’ll find a ready-made module or pass it to a developer for an estimate. Modules, custom features, layout, integrations, speed, migration, technical SEO.