













WooCommerce
Shippo & EasyPost Shipping Labels for WooCommerce — live USPS, UPS, FedEx and DHL rates and labels
Free + Pro
890 UAH/year≈ €18
v1.0.0
 Website auditA PDF report by email in 3 minutesCheck a website
Everyday tasks
Image compressorSize, quality and WebP in bulkQR generatorLink, Wi-Fi, payment to IBANVAT calculator20, 14, 7% and amount in wordsTransliterationOfficial Ukrainian standardWebsite checks
PHP and pluginsPHP version, WordPress, pluginsGoogle Merchant feedFields, prices, GTIN, imagesDomain emailSPF, DKIM, DMARC, blacklistsAI search readinessllms.txt, bots, markupAll 9 toolsEnter at least 2 characters
Buyers split the order into monthly payments on their own card through the Splitit form; the plan is checked with Splitit before the order is paid.
The free version works with no time limit. Pro adds the rest of the features in the table.


The settings live in one place: WooCommerce → Splitit.

Webhooks: every new plan reports its approval to the shop, so the order is paid even when the buyer never comes back from the form; the same address pasted in the Merchant Hub brings cancellations, refunds, failed installment charges and disputes into the order notes.

The base version is free. Pro costs 1290 UAH for a one-year licence. A year of updates, technical support and all Pro features.

A fresh install is the free version, nothing switches on by itself. The “Try Pro for 7 days” button → e-mail → the key right in the window and by e-mail.

Moving the site? Unlink the licence on the old domain and activate it on the new one yourself. A staging copy (staging., dev.) works with the same key and does not take a site slot. For studios — keys for 5 or 25 sites, or unlimited.
 WordPress 6.4+, WooCommerce 8.6+, PHP 7.4+.A Splitit merchant account: client ID, client secret and terminal ID.A shop currency your Splitit terminal supports (for several currencies Pro takes a terminal per currency).
Splitit installments at the checkout, the plan checked before the order is paid, the status check, a refund of the remaining amount, the line under the price.


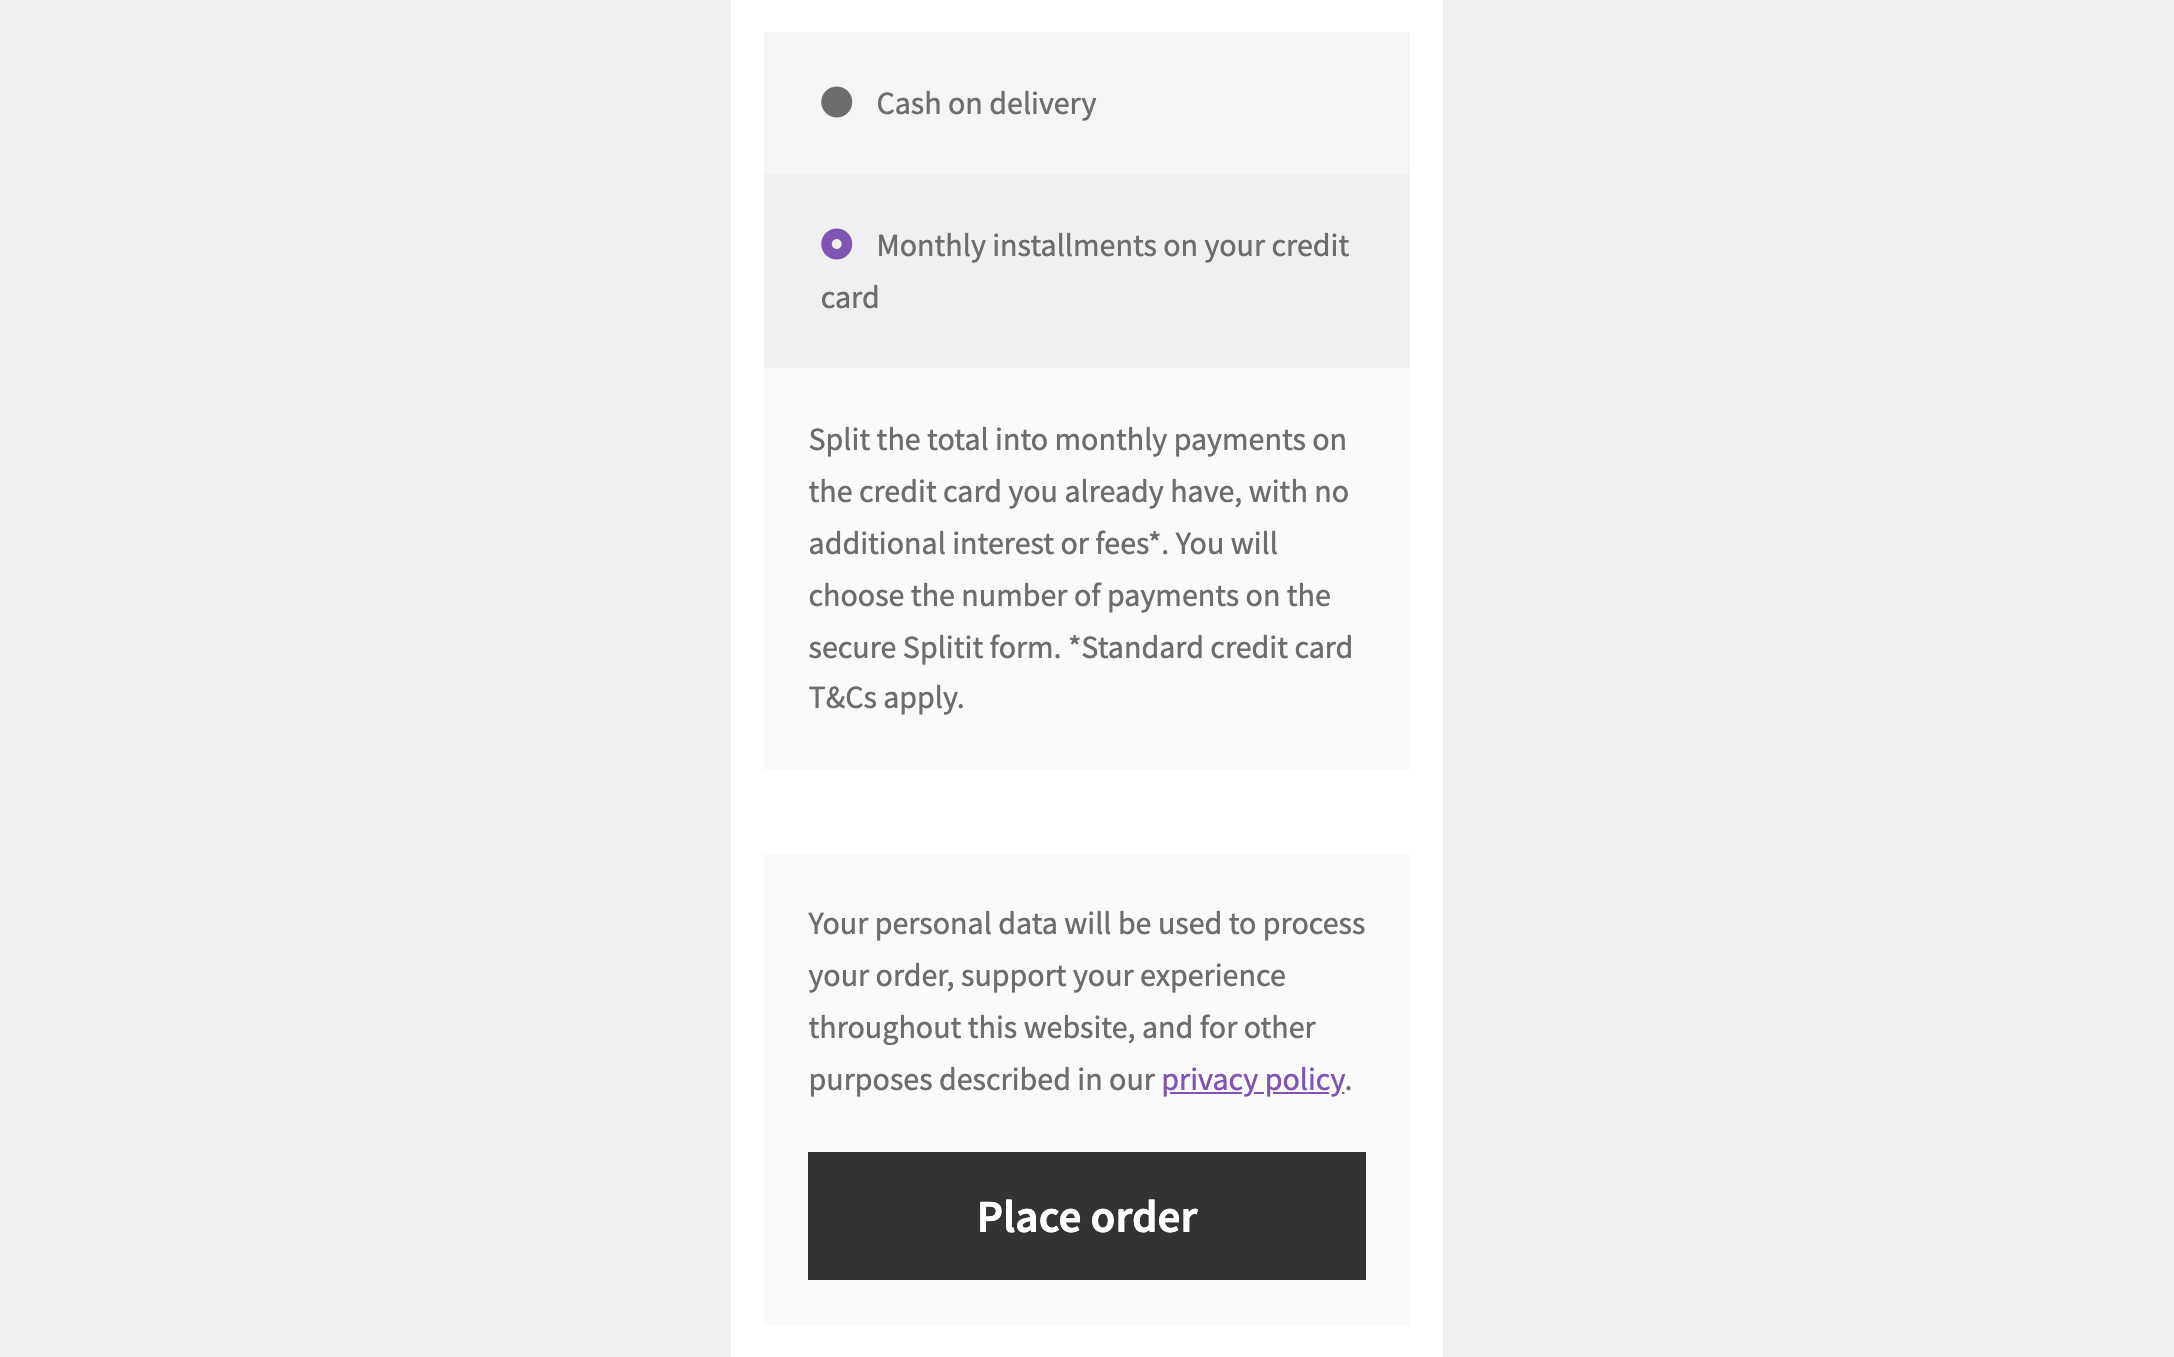
Installments with Splitit for WooCommerce lets buyers split the order total into monthly payments on the credit card they already have: no new application. At the checkout the buyer picks Splitit, lands on the Splitit form, chooses the number of installments and types the card there, so card data never reaches your shop. It works with the classic and block checkout and HPOS. You need your own Splitit merchant account.
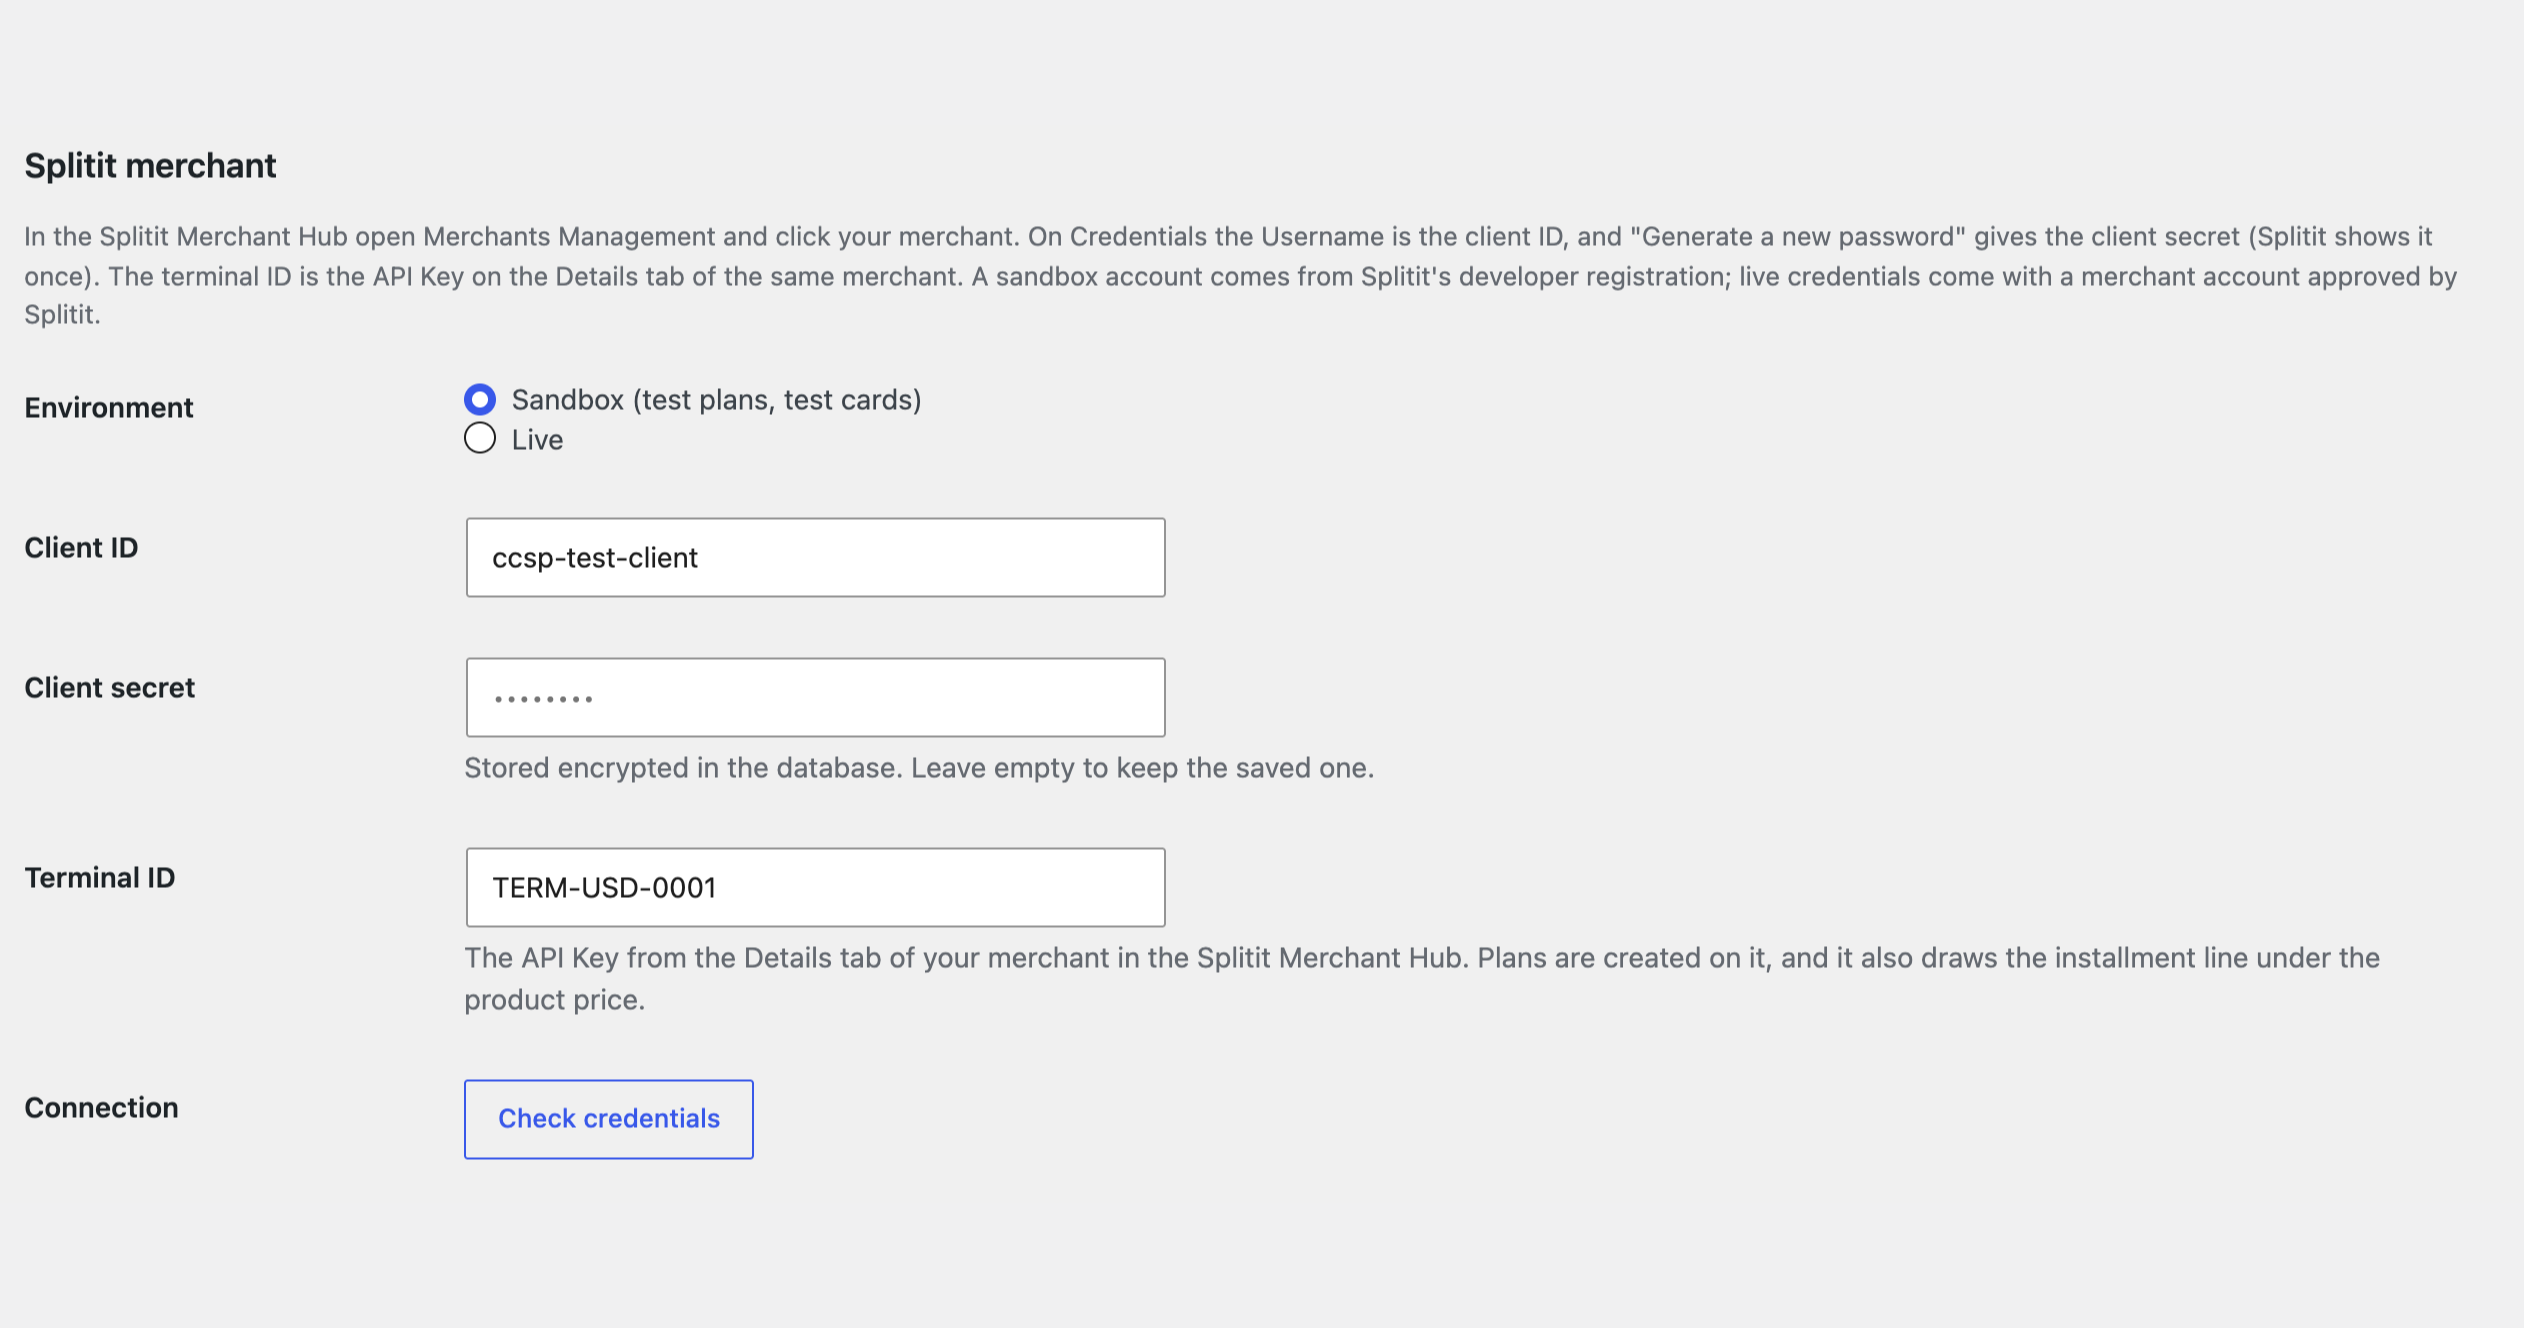
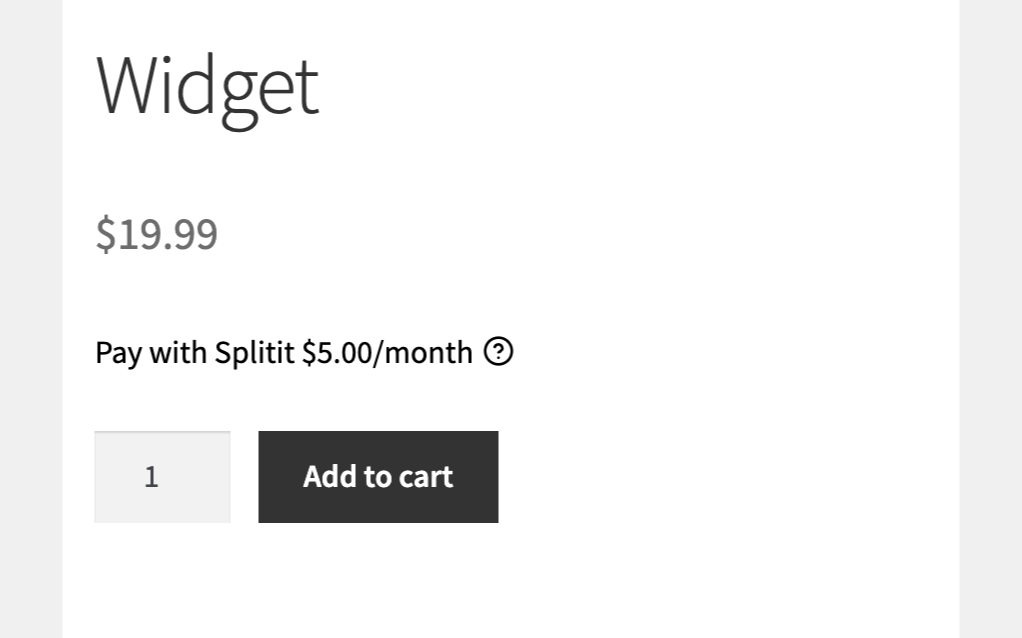
The settings live in one place: WooCommerce → Splitit. Choose the mode (test or live), enter the client ID, the client secret (stored encrypted) and the terminal ID. “Check credentials” asks Splitit whether it accepts them, and “Create a test plan” makes a plan on your terminal and shows the address of its form. Each order becomes a Splitit installment plan with the total, the currency, the order number and the buyer’s billing details, so nothing is typed twice. When the buyer comes back, the plan is checked with Splitit (Verify Authorization) and its amount and currency are compared with the order; only then is the order paid, and an amount mismatch puts it on hold with a note. A declined card returns the buyer to the checkout with the cart intact and the order marked failed; leaving the form keeps the order pending and the cart in place. “Check payment status” on the order asks Splitit about the plan (for a buyer who closed the tab after paying) and shows how many installments are charged. A refund of the whole remaining amount goes from the WooCommerce order straight to Splitit. Under the price on the product page Splitit draws a line with the monthly payment (On-Site Messaging) and updates it when a variation is chosen. You can set the numbers of installments offered, 3-D Secure and an order total range.
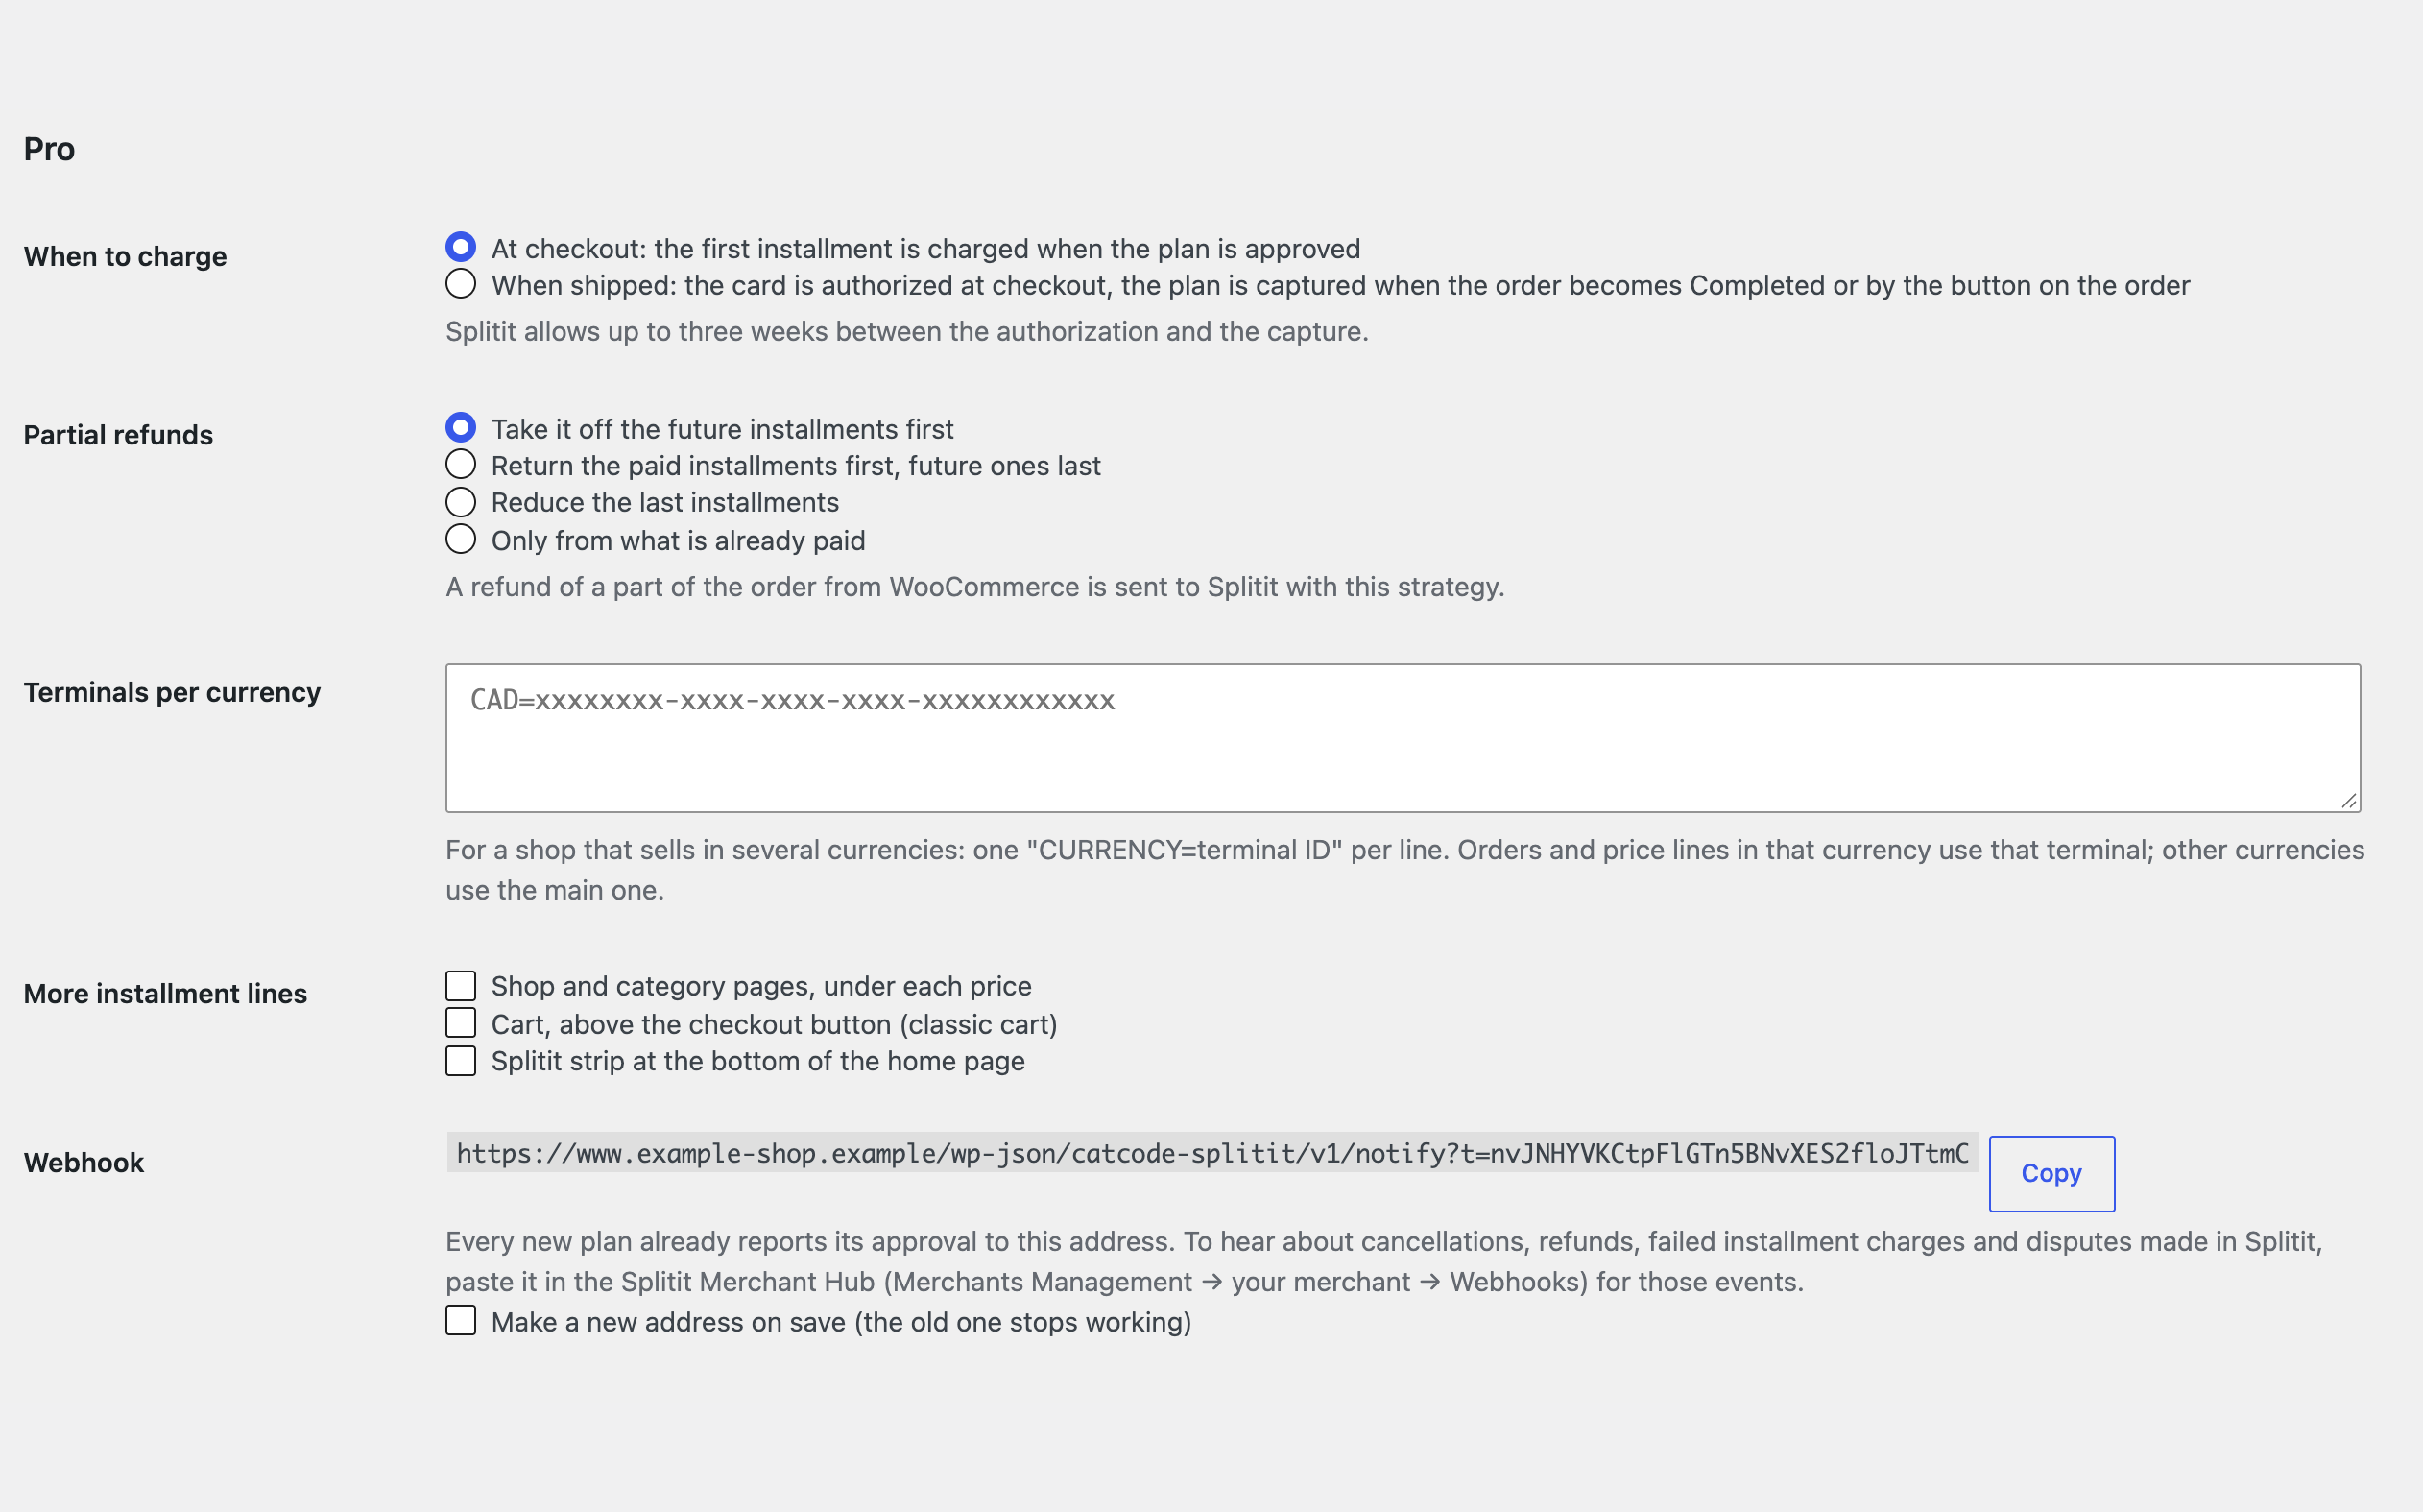
Webhooks: every new plan reports its approval to the shop, so the order is paid even when the buyer never comes back from the form; the same address pasted in the Merchant Hub brings cancellations, refunds, failed installment charges and disputes into the order notes. Every 15 minutes a background check asks Splitit once more about the plans of pending orders. Charge when shipped: the card is authorized at the checkout and the plan is captured when the order becomes Completed or by a button with the tracking number. Partial refunds of any part of an order, with the Splitit refund strategy of your choice; refunds made in the Merchant Hub are recorded on the order. A separate terminal for each currency of the shop. Installment lines in the shop and category pages, in the cart and a Splitit strip at the bottom of the home page. A journal of the last Splitit events and a CSV report of Splitit orders for a period, to reconcile with Splitit’s settlement reports.
The module is not on wordpress.org yet: the free version and Pro are one archive from this page. Without a key it works as the free version.
Didn't find the answer? Message us on Telegram and we'll reply within a business day.
 @catcode_support
Setup, compatibility, activation
No. It is an independent integration made by us; Splitit is a trademark of its owner.
Yes, your own merchant account. Live payments are available once Splitit approves the account; the plugin does not do the onboarding.
Press "Check payment status" on the order: the plugin asks Splitit and pays the order if the plan is approved. With Pro this happens by itself.
Free refunds the whole remaining amount, and a part can be refunded in the Splitit Merchant Hub. Pro sends partial refunds from WooCommerce.
Yes, with the classic one and with HPOS too.
Pro switches off, the free part keeps working.
No reviews yet. Be the first.
No questions yet. Ask one — we answer within 24 hours.
We build custom modules for WordPress, WooCommerce, OpenCart and Shopify. Tell us about the task and we'll prepare an estimate.
Order a custom module
—
Charged in UAH; your bank converts it to your currency. EUR price is approximate.

CatCode assistant
Just now


CatCode assistant
Online

I’ll help with your website task
Describe your website task — I’ll find a ready-made module or pass it to a developer for an estimate. Modules, custom features, layout, integrations, speed, migration, technical SEO.